BidVertiser is a platform with many opportunities for different verticals

Back in 2003, Bpath LTD, the company behind BidVertiser, noticed the need for website owners to sell their ad space directly to advertisers, overcoming the shortcomings of automated systems (which were mainstream at the time).
Since then, we’ve served thousands of advertisers and tens of thousands of website owners (and media buyers) by expanding our services to mobile, programmatic buying and selling, and recently focusing on our demand-side platform.
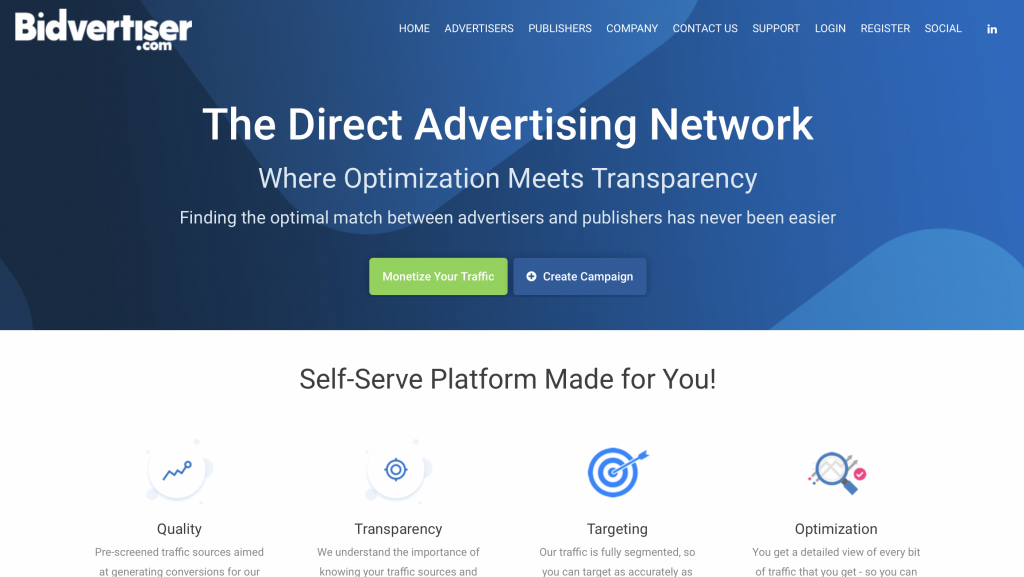
BidVertiser is a premium, demand-side self-service platform that delivers highly converting traffic.
The ad network was created in 2008 as a solution to the problem many publishers had with selling their ad space directly to advertisers without having to rely on automated systems. It was developed from the ground up by a team of in-house developers in Haifa, Israel, giving BidVertiser complete control over their systems. This meant that they were able to quickly adapt to the needs of their customers and the rapidly changing environment.
In addition to its headquarters in Israel, BidVertiser also has a support center in the UK, a data center in California, and distributed data on AWS and Rackspace Cloud. In this article, we’ll focus on BidVertiser’s advertiser demand platform, which includes a global network of publishers designed to help you get more conversions.
Stage 1. Registration
So you can follow along – or if you want to jump right in and see what BidVertiser is all about – click the Register button in the website’s top navigation bar. You will want to register as an advertiser unless you are also interested in selling ad space on a website you own.
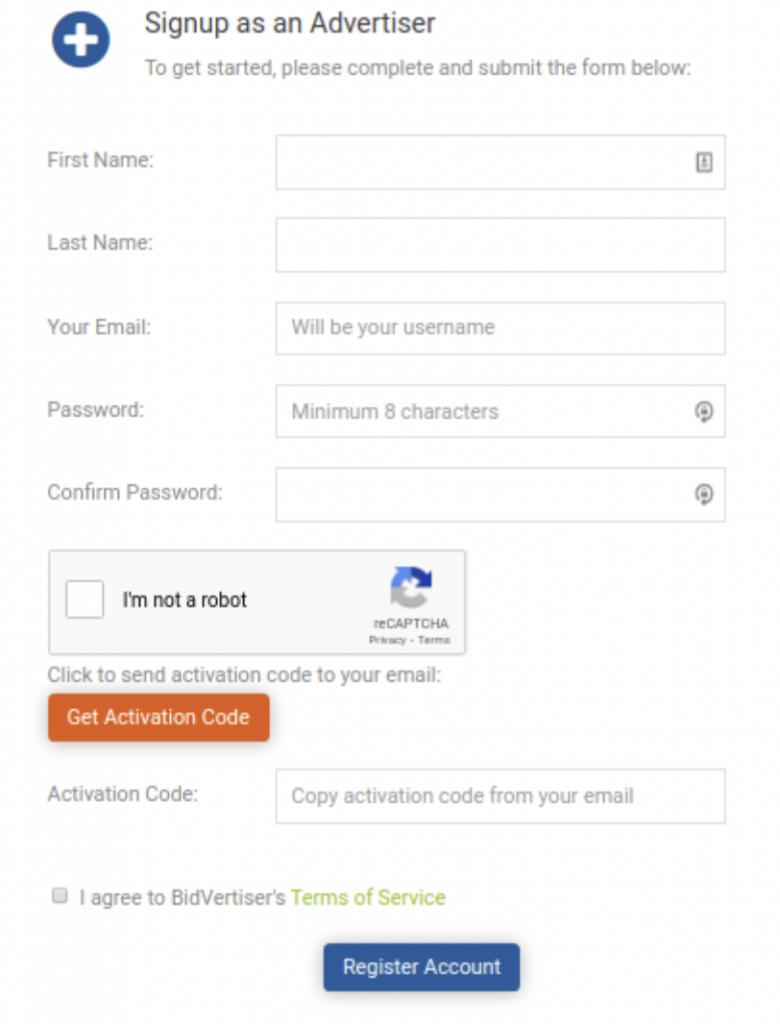
Stage 2. Account activation
One thing you’ll probably notice right away is the pink “Activate Account” button on the top navigation bar. The minimum deposit amount for BidVertiser is usually $100.
Step 3. BidVertiser Overview: Dashboard
The same toolbar is used by advertisers and publishers, so make sure you select the Advertisers tab.
From here you can manage your campaigns, reports, funding and payments, as well as your account. There is also a Traffic Estimator tool that you can use to view daily real-time traffic estimates and recommended minimum bids for your chosen ad format. Times are in UTC, so keep that in mind when creating campaigns.
Stage 4. First advertising campaign
The campaign tab consists of 5 sections:
- Campaign management
- Create a new campaign
- Global postback
- Loading Conversions
- Bid Automation Log
If you haven’t created your first campaign yet, the campaign management section will be empty, so skip it for now and click “Create New Campaign”. Now it’s time to decide which ad format and targeting you want to use.
BidVertiser offers 5 different ad formats:
- Direct advertising – traffic from expired links, typos or domains that redirect to your domain.
- Pop-Under – ads are displayed under the active browser window.
- Native ads are ads that match the look and feel of the surrounding content.
- Push ads are ads that are sent as alerts to the user’s device.
- Contextual Popups − These popups are based on the contextual content of the page the user is viewing.
There are also different minimum daily budgets and pricing models depending on the ad format you choose, so it’s important to be clear about your campaign goals from the start. Regardless of which ad format you choose, you’ll be bidding on traffic that’s distributed to advertisers based on their bids. Different ad formats have different minimum bids, so be sure to check the traffic estimator beforehand. If you want to bid on adult traffic (or ads with explicit content or nudity), you need to use direct ads, pop-ups or push notifications.
Step 5. Tracking
What tracking options does BidVertiser offer? To find out, click Global Postback in the Campaign Creation section. You can use this to find out which clicks led to conversions and optimize your traffic sources by entering the postback URL into your tracker.
Two parameters you can track:
{BV_CLICKID} – be sure to mark your ad with this parameter on the “Edit ad” page;
{REVENUE} – represents the revenue from your conversion.
First, activate Global Postback by clicking the green button on the page. This will show the link associated with your advertiser ID like this:
http://secure.bidvertiser.com/performance/pc.dbm?ver=1.0&AID=XXXXXXXXX&CLICKID={BV_CLICKID}&revenue={REVENUE}
This postback URL will fire when you navigate out of the ad network, provided you’ve correctly tagged your ad on the Edit Ad page. Many trackers, such as Voluum and BeMob, are already integrated with BidVertiser, which can make the process even easier.
Stage 6. Bid automation
One of the best features of BidVertiser is its ease of use. Bid automation (accessible from the advanced campaign settings menu) instructs the advanced algorithm to optimize your campaigns. You will need to give it some time to run.
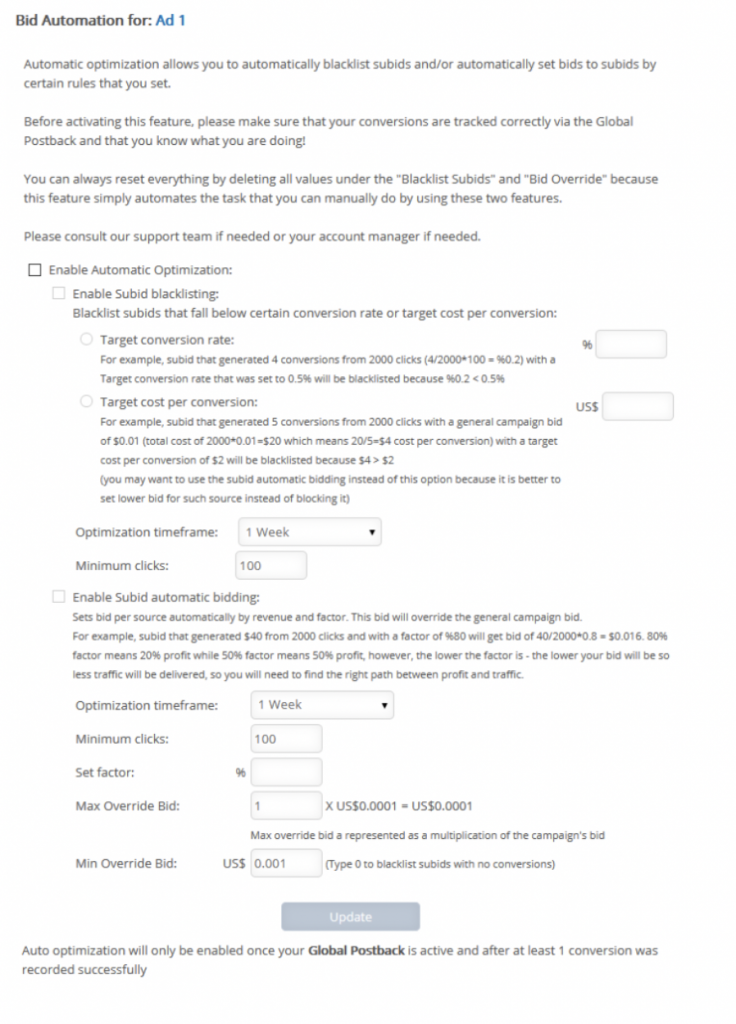
You can choose between Subid blacklisting and automatic Subid bidding.
To blacklist a Subid, enter your target conversion rate and target CPA, as well as the time frame and minimum clicks. Perhaps the best way to handle this (at least in the beginning) is to use Subid’s automatic bidding option. To do this, you need to set the optimization period, as well as the profit ratio (in percent). You can then set up minimum and maximum override bids and let the system track the traffic performance for your campaign.
If you need a minimal approach to campaign optimization, you can use automatic optimization.
Step 7. Campaign Reporting
This includes daily activity, daily summary and analytics platform.
It’s useful to view daily statistics, including ad requests, visits, and spending.
The analytics tool can give you a more detailed view of your campaign and you can break down the data into several metrics:
- Daily
- Hourly (2 days max)
- Category
- Subid
- OS
- Browser
- ISP
The beauty is that if you use a postback pixel that sends the conversion back to BidVertiser, you will see how your campaign performs for each of these metrics, making it easier to optimize.
Stage 8. Funding and Payments
We mentioned earlier that in order to take advantage of all the features of BidVertiser, you first need to activate your account.
Here’s how to do it:
- Click Add Funds
- Select the amount you want to add
- Choose your payment method
BidVertiser offers many different fee-free payment methods, including credit card, PayPal, WebMoney, Crypto, Payoneer, and InterKassa.
Stage 9. Conclusion
BidVertiser is a platform that works well for many types of affiliate offers. The recent additions of push notifications, native and contextual popups are a nice addition and will appeal to affiliates who work with multiple ad formats.
It is also one of the few ad networks where you can get adult traffic using different ad formats. If you have such verticals and want to make a profit, contact us and we will help!